
 Having rust treated a few holes in the chassis, I thoroughly cleaned the back of the van to get rid of any grease. Then it was time to cover the whole of the rear floor with a layer of sound deadener. I found that if I laid the RAAMmat across the raised bits and then eased it into the ridges with the rubber handle of a claw hammer it worked really well and reduced the amount of creases. It is really pliable, can be cut with normal scissors and doesn't cut your fingers at all (apparently Damplifier Pro does?). I saved the wheel arches until last and I am pretty pleased with the results. In any case both will be carpeted, and the off side arch will be covered by furniture and the near side one will be under the Rib bed/seat. I used about 2 1/2 15"x 15" pieces of RAMMmat for the arches and nearly a whole pack (20 sheets) for the floor. The rest will go on the side panels and the tailgate.
Next job was to cut a template of the floor using the EZ Cool automotive insulation. Its 4 foot wide so I used two pieces. I then laid this over a 5' x 10' sheet of 9mm ply and drew around it. I used the larger sheet as I wanted the floor in one piece, however I realised a 5' sheet isn't quite wide enough (a 4" x 6" ish piece is missing behind the near side rear wheel arch), but I'll just make it up from an off cut. I used a jigsaw to cut around the shape and it was pretty much bob on, bar a few little bits here and there that needed shaving off.
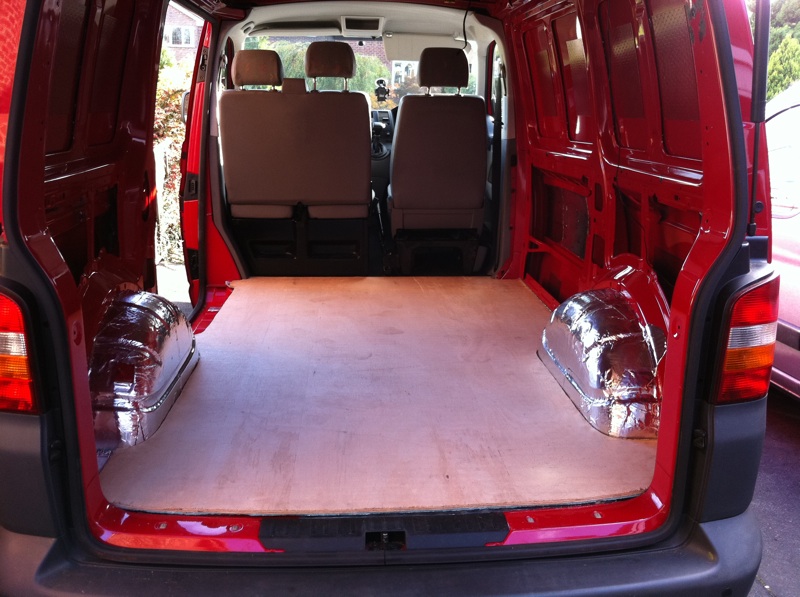
The EZ Cool was stuck to the underside of the ply (which the adhesive from Megavanmats) and the new floor was slid into place, and hey presto I should hopefully have a quieter ride up to Custom Campers in Halifax, for the new roof etc. Before the floor is fitted permanently I am going to put down some small ply pieces in strategic places to ensure the floor doesn't bend anywhere and so it can be screwed to something to keep it flapping at the edges etc.


